Good Food, Clean Cooking, My Life


Showing posts with label Vegetarian. Show all posts

Thursday, April 29, 2010

Using leftover baked potatoes.

A long time ago my dad told me that his mom used to bake several potatoes in the oven with the purpose to use some later in the week.  I have done this several times and have used them for different things.  He said that one way she would use them was to cut them in slices and pan fry them.
So, here they are cut in slices.
In my head I wanted to do a garlic, thyme, sea salt and pepper potato, but then I looked in the fridge and had some left over pesto that didn't fit in the ice cube trays.  So, then I wanted to also do a pesto potato.
I infused some olive oil with garlic and then discarded the garlic, because it would have burned in the cast iron.  Then I put the potatoes in and sprinkled them with some sea salt, pepper and fresh thyme.  Cook them for a few minutes and then flip.
These don't look too impressive, but they are good.  The middle of the potatoes are almost hollow inside from the baking, so they are super crispy inside and out!
I did the same method with these potatoes without the garlic and salt.  Heat some olive oil over medium heat and put one layer of potatoes down.  Once golden on one side, flip over to the other side.  Once they are flipped .... get ready, here's the brilliant part...  spoon about a teaspoon of pesto over each potato!  I know!  Yummy.  Let the other side finish cooking by getting golden brown, transfer to a towel to absorb the excess olive oil and then transfer to a plate.  Sprinkle with some parmesan cheese and that's it!
These were Oh... My... Goodness delicious!!!  The potato was crunchy on the outside as well as inside and then there was the creaminess of the pesto and inside of the potato.  Truly, you have to try this!!

One potato made both types of potatoes above.
Click here for the method to cook the baked potatoes ---->Baked Potatoes
Click here for the pesto recipe---->Basil Pesto

Baked Potatoes and Sweet Potatoes

I'm leaving town in a few days and am trying to use up my produce before leaving.  Here I have 2 sweet potatoes and 2 regular potatoes.  I am trying to clean the house, do laundry, etc. so I really don't have a lot of time to be creative.  And... the last time I tried making sweet potato chips with my food processor, it landed me in the ER and me getting 7 stitches.  That was just about 3 weeks ago so I don't want to revisit that.  So, baking it is!
Rinse and scrub the potatoes well in water.
Pierce with a fork several times over all potatoes.
Dry well.
Drizzle a little olive oil over each one... maybe about 1 tsp per potato.
Sprinkle a little sea salt on each one.
Place in the center oven the oven.  Cook for 30 minutes at 400 degrees and then turn potatoes over.  The sweet potatoes were finished after cooking for 45 minutes and the regular potatoes cooked for 1 hour 15 minutes.  The potatoes are done when a knife pierces the potato and slides back out without effort.
The sweet potato is already starting to caramelize, yum!
Here are the regular potatoes post cooking.  They are nice and plump and give a little when pressed.
I decided that I couldn't wait and cut open the small sweet potato, put a dab of butter on along with a hint of brown sugar.  Who needs dessert when you can have this!?

You can do many things with the potatoes now.  You can serve them up as regular baked potatoes (served up with butter, sour cream, bacon, chili, salsa... you get the picture), scoop the insides out and make twice-baked potatoes, scoop them out and make potato soup, refrigerate them and use them for hashbrowns the next morning... really the possibilities are endless.

Sesame Noodles

This is one of those recipes that is a great example of what you can do with a well-stocked pantry.  This is a  great recipe for spring and summer.  This can be served cold or at room temperature.  My favorite way is room temperature.
Here is what you'll need:
12 oz. angel hair pasta
3 Tbsp dark sesame oil
3 Tbsp olive oil
1-inch piece of fresh ginger, minced
3 garlic cloves, minced
1 tsp red chili paste, such as sambal
1 lime, juiced
2 Tbsp honey
1/2 cup creamy peanut butter
3 Tbsp rice vinegar
3 Tbsp soy sauce
6 Tbsp hot water
1 Tbsp toasted sesame seeds
Fresh cilantro, for garnish
1 large zucchini
Cook your pasta according to the package instructions.  In your blender combine, the olive oil, ginger, garlic, chili paste, honey, lime juice, peanut butter, rice vinegar, soy sauce, and  hot water.
Blend until everything is combined.
Chop your zucchini.
Literally, at the last minute of cooking add your zucchini to the pot with the pasta.
Toast the sesame seeds until they are light golden.  Be careful not to burn.
After cooking the zucchini for one minute with the pasta, drain both and rinse with cold water.  Drain well.
Once the pasta and zucchini have cooled down, transfer to a bowl and pour the dark sesame oil over the noodles.  Toss well to combine.  Once the noodles are coated with the sesame oil pour the peanut sauce over the noodles and toss again to combine.
Garnish with fresh, chopped cilantro and toasted sesame seeds.  Again, my favorite way to eat this is room temperature.  It's yummy!

Homemade Basil Pesto

I really love the flavor of pesto.  It's strong, so I don't eat a lot of it or very often, but I do enjoy it.  You can use pesto over pasta, as a base for pizza, on sandwiches or I have a surprise way to use it in a blog post coming soon!
Here's what you'll need:
4 cups packed fresh basil leaves, rinsed and dried off
1 Tbsp minced garlic, as you can see I have a mixture of cloves, minced they equal 1 Tbsp
1 cup olive oil
2 Tbsp pine nuts, toasted
1/2 cup grated parmesan cheese
salt
black pepper
Roughly chop the basil and mince the garlic.

Toast the pine nuts until they are a light golden brown.

Put everything minus the parmesan cheese into a food processor, including the olive oil , and process for a couple of minutes to combine.
It's swirlin'!
Now is the time to add the yummy parmesan cheese and then process once more to combine.
This is the consistency that you will have.
Pour it into a container if you will be using the same day.  Take note of the thin layer of oil on top, this is totally fine and actually helps the pesto keep its great color.  This recipe makes 2 cups of pesto.

If you will not be using the pesto the same day you may pour it into icecube trays and freeze for future use.

Tuesday, April 27, 2010

Homemade Granola

I have made homemade granola for years and years.  Actually, I don't know if I have ever purchased packaged granola.  My favorite recipe until recently was great, didn't use any oil, but it did have 1 1/2 cups of brown sugar.  In trying to cook "better" I set out to make a better granola.  I made a huge batch using honey once and it was a disaster!  Through lots of trial and error I finally had a successful batch today. 
You will need:
6 cups oats
1/2 cup barley
1/2 cup flax seed (I forgot that I only had milled flax seed, but I went ahead and used that anyway.)
1/2 cup wheat germ
1 tsp ground cinnamon
nutmeg (add to your liking)
3/4 tsp salt
1/4 cup raw sugar
3/4 cup unsweetened applesauce (This takes the place of the oil that is in a lot of recipes.)
1/2 cup pure maple syrup
1 tsp vanilla
1 cup chopped walnuts
1/2 cup sunflower seeds
(You may choose any combination of nuts and/or seeds that you like.)

In a large bowl combine all of the dry ingreidents.
Then, in another bowl add  the wet ingredients.

Mix the wet and dry ingredients thoroughly.  Line two rimmed cookie sheets with parchment paper and divide the mixture evenly.  It's very important to spread it all out.
 
Bake at 325 degrees for 30 minutes, stir and bake another 15 minutes.  Rotate the pans if you need to for a more even cook.  Cook longer and stir every 5 minutes until the mixture is dried out and crunchy.  Cool and then store in an airtight container.


Monday, April 26, 2010

Hummus

I love hummus!  It is a garbanzo bean spread that is used in the middle east a lot as well as in some of the Mediterranean countries.    I first had it in Spain at a Mediterranean restaurant and then I had it in Crete along side of their yummy goodies.  A lot of restaurants serve this as their version of (chips and salsa) in the middle east and in the Med. region.  Ever since first trying it I have been hooked.  It is inexpensive to make, very easy and good for you.  It makes a great appetizer, but I also love it for lunch.  I will slice open and heat up a piece of whole wheat pita bread and then top it with some hummus.  Hummus is also a great dip for veggies and can even be used as a sandwich spread.

Here is what you will need:
2 cans garbanzo beans(chickpeas)
3 Tbsp Tahina (sesame seed paste)
1/2 to 1 tsp cumin
1 tsp paprika
2 cloves garlic
5 Tbsp lemon juice (I was able to get 5 Tbsp from 2 lemons.)
3 Tbsp. Olive oil
Salt
Pepper


Drain and rinse the garbanzo beans.
Juice your lemons to make 5 Tbsp.


Load everything up in a food processor, including your garlic and seasonings.
Puree until well combine.  This is the consistency that I like, but you may like it creamier.  At this point you can add a little more olive oil or some water until it is the consistency that you prefer.  Taste and re-season to your liking.
This recipe makes about two cups of hummus.  Store in an airtight container in the refrigerator and it will keep for 5-7 days.

Friday, April 23, 2010

Homemade Almond Milk

I am lactose intolerant and have been searching for a non-dairy milk to use.  I used to use soy milk with cereal and smoothies, but I realized that I was getting headaches.  I linked the headaches to the carrageenan in the soy milk.  Carrageenan is very similar to MSG and people (like me) that have adverse reactions to MSG will most likely have the same reactions to things with Carrageenan in it.  Commercial Almond Milk and Soy Milk are overly processed.  So, I set out to make my own almond milk, so I thought I would share it with you.
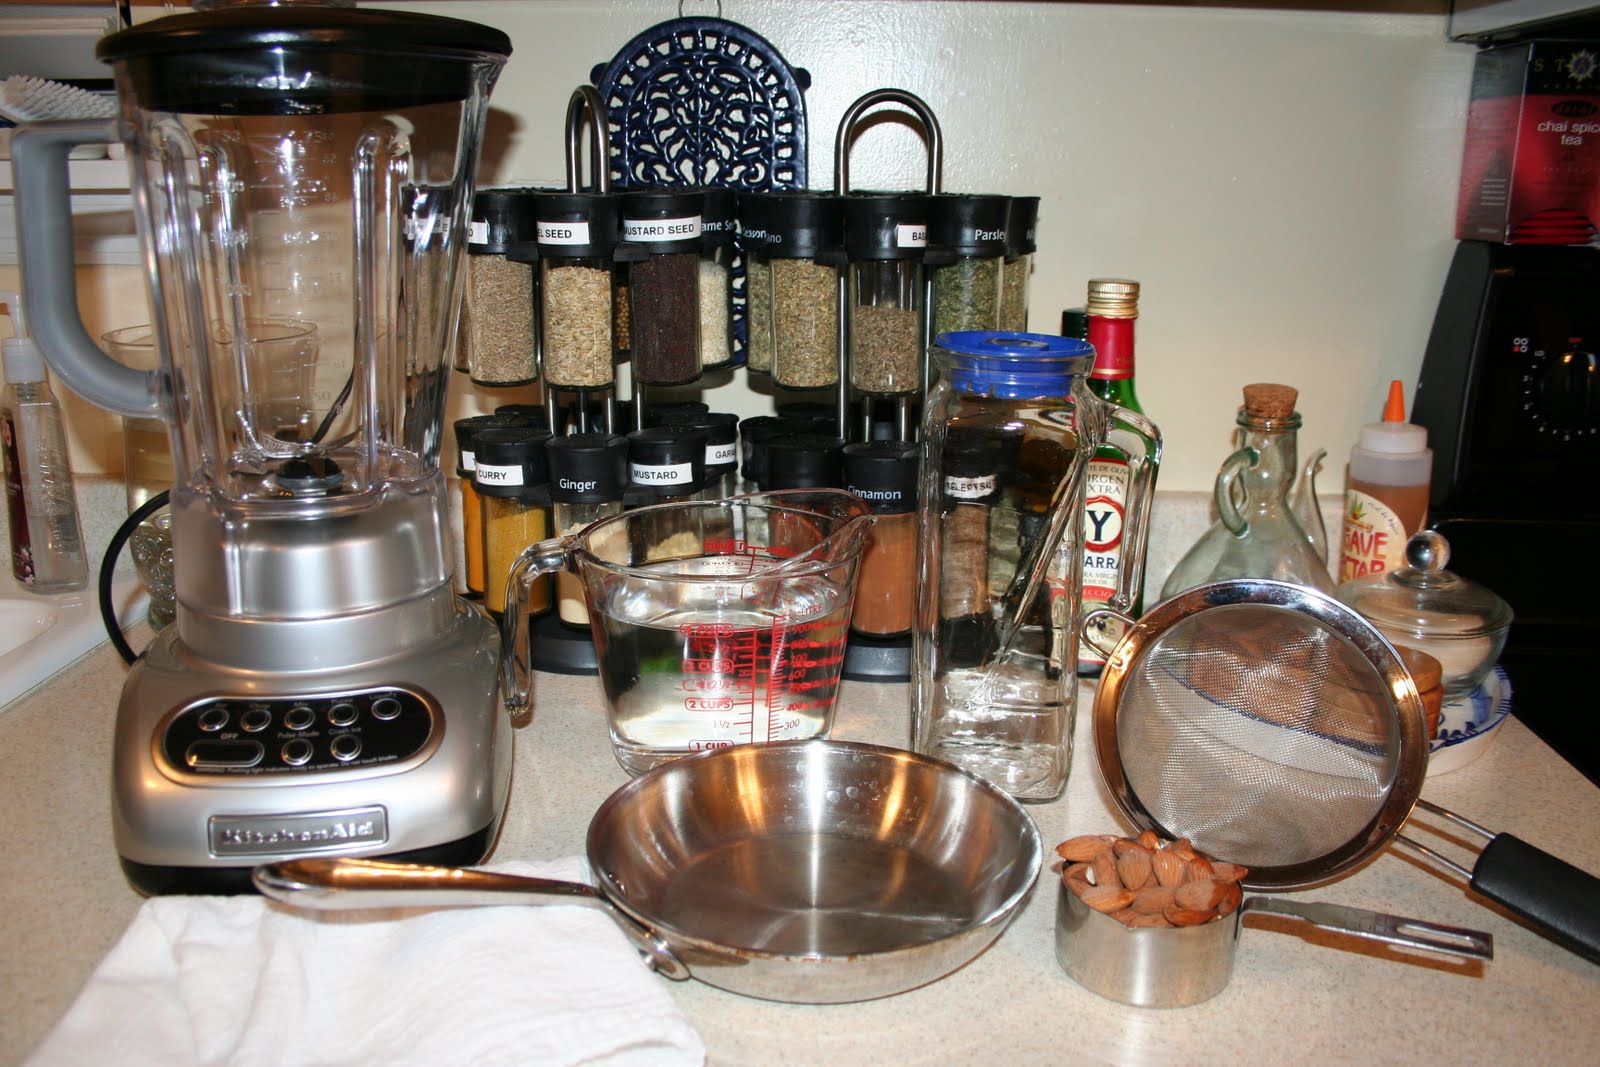
You will need:
2/3 cup raw almonds
4 cups water, plus more for boiling
small skillet
fine mesh strainer
blender
container to store the milk

First, you will want to blanch the almonds.  Place the almonds in the skillet and cover with water, bring to a boil and boil for 3-4 minutes.  This will losen up the skin on the almonds, making it easier to remove.
After 3-4 minutes of boiling, drain off the water and place on a towel and let cool a few minutes.
The skin will now be super easy to pop off of the almond.  Remove the skin from all of the almonds.
Place the 4 cups of water and the almonds in the blender.
Liquify the mixture for a couple of minutes, allowing the almonds to become a very fine mixture and turn into milk.  Below is what you will see.  It starts out a little tan and then turns white.
 Here is what it will look like once it is completely combined.
Pour the milk over a strainer back into your measuring cup.  I would like to suggest putting a piece of cheesecloth over the strainer to catch some of the fine bits of the almonds.  This is not necessary, but will give you a smoother milk.
This is what is leftover.
And, here you go, here is your milk!  Store in the refrigerator or up to a week.  Stir before using.  This recipe makes 4 cups.